

How to Generate Synthetic Defect Data
When real defect examples are too rare to train on, ReliVision can generate them. You import your own non-defective images, mark where a defect should appear, choose a defect type from the GenAI library, and the platform renders a synthetic dataset on your own material — all inside ReliUI, with no external tooling and no generative model of your own to host.
- 5 steps
- No code
- Sample defects provided
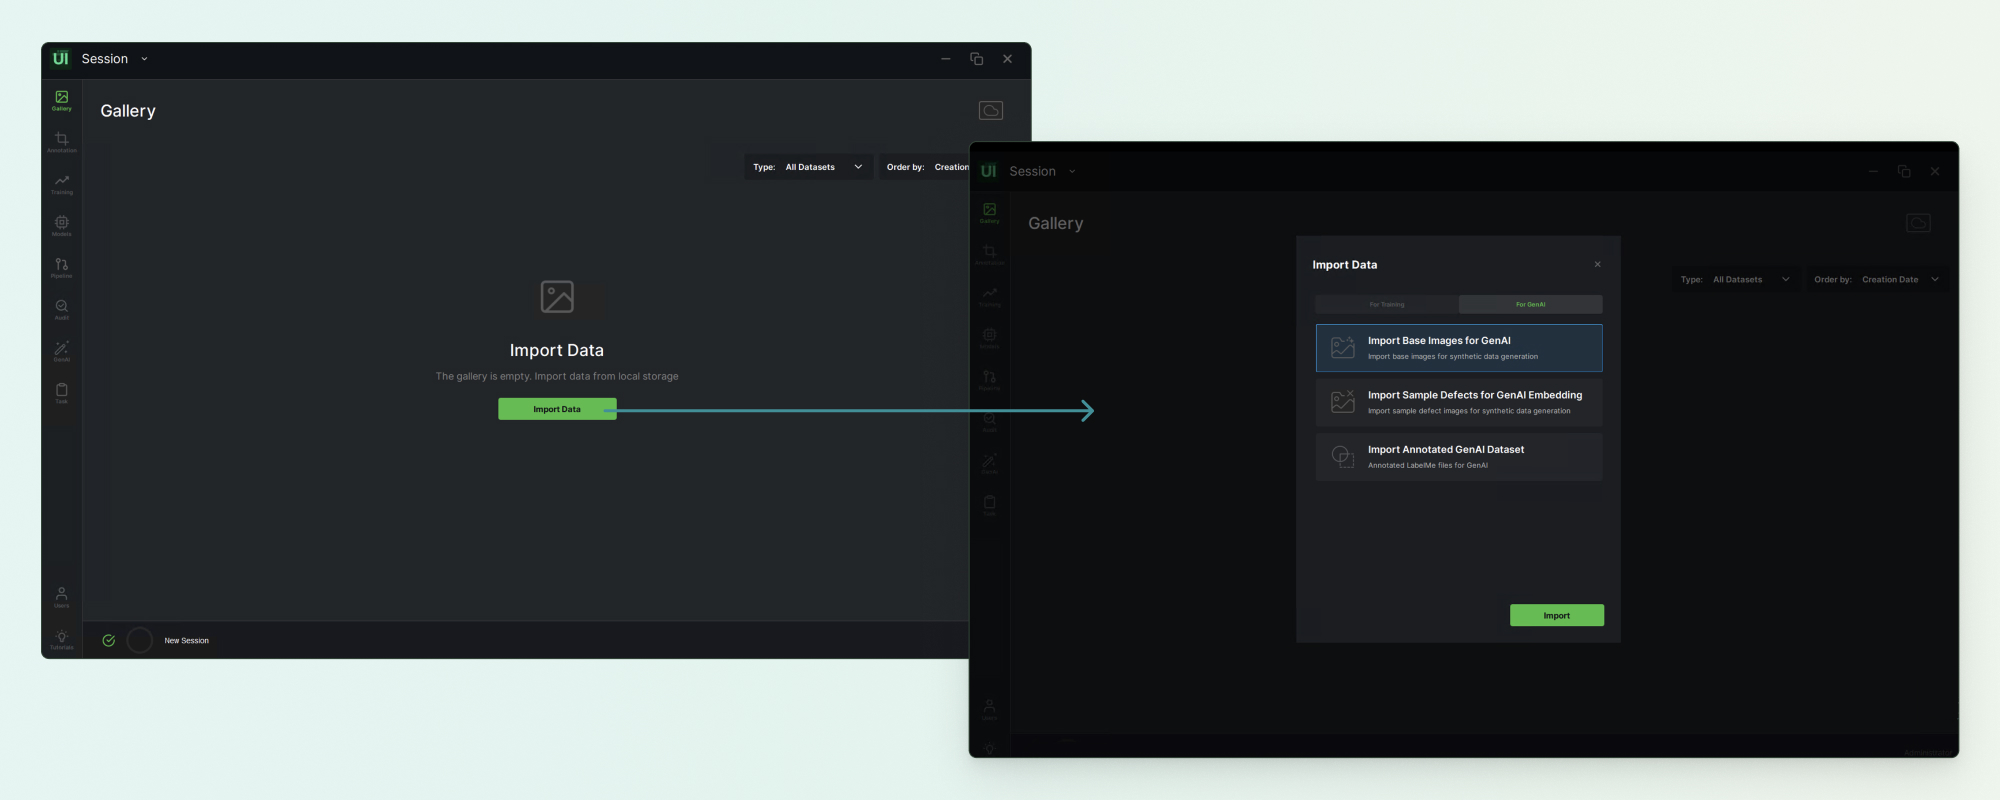
Import your data
Synthetic generation starts from your own non-defective images. ReliVision uses them as the clean base that defects are rendered onto, which is what makes the output match your real material, lighting and camera rather than looking like a stock texture.
What to do
- In ReliUI, open the Gallery.
- Click Import Data, then select the GenAI tab.
- Import your non-defective images.
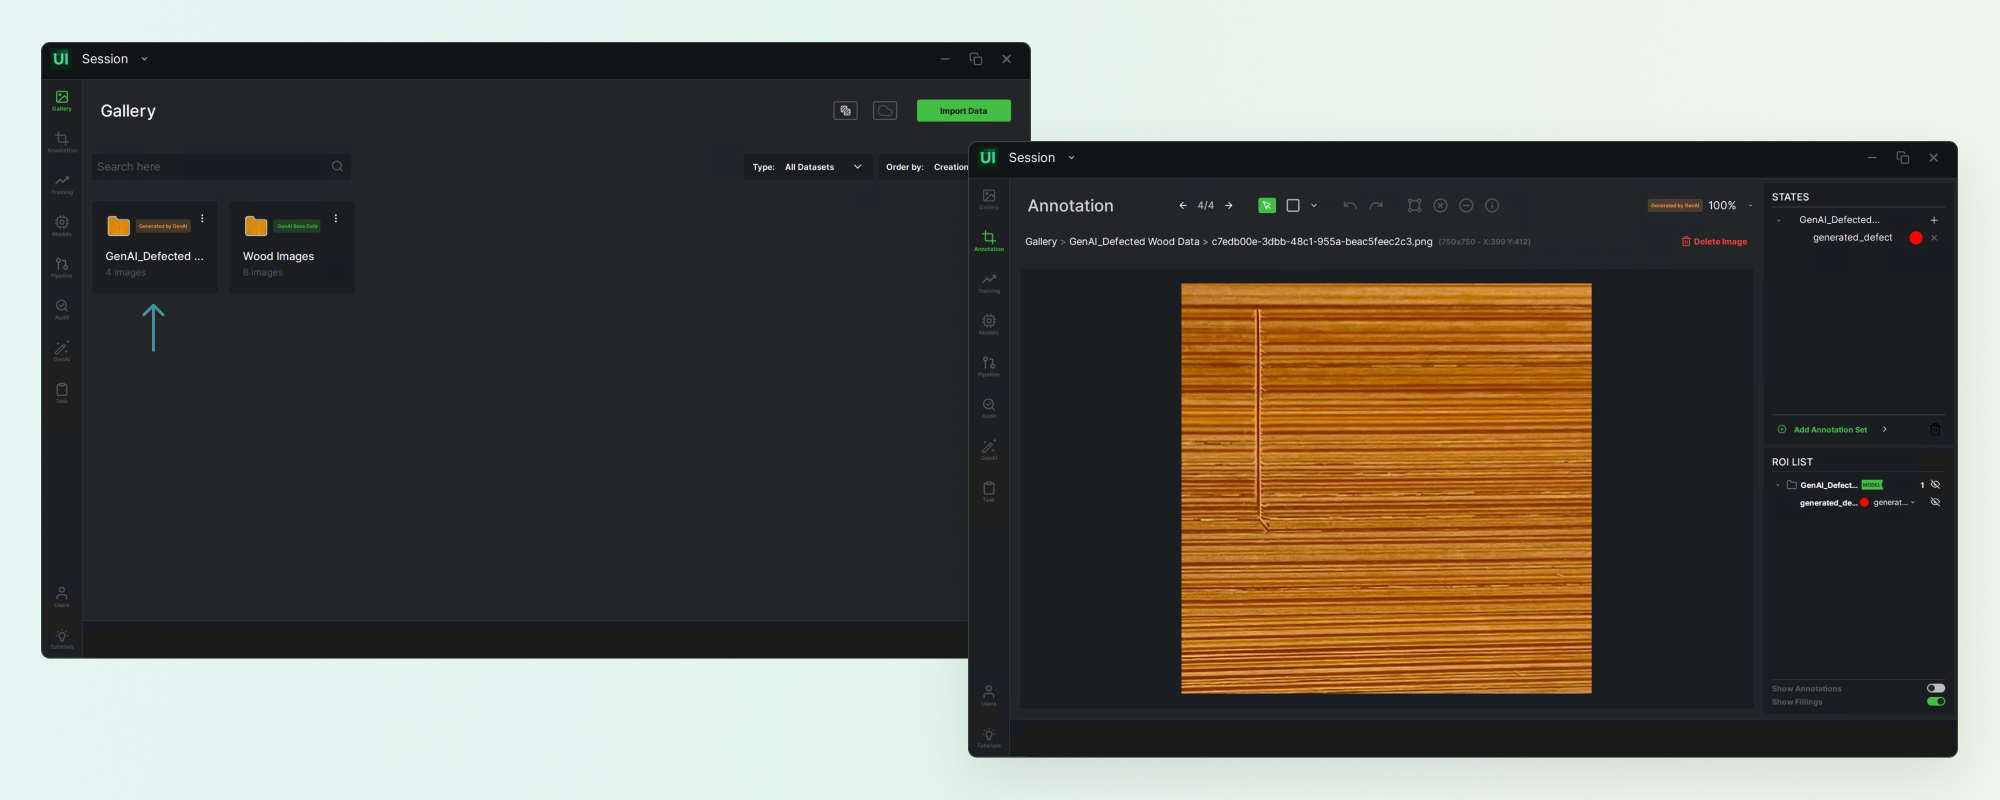
- The image folder appears in the Gallery. Double-click it to open the images.
Annotate the target areas
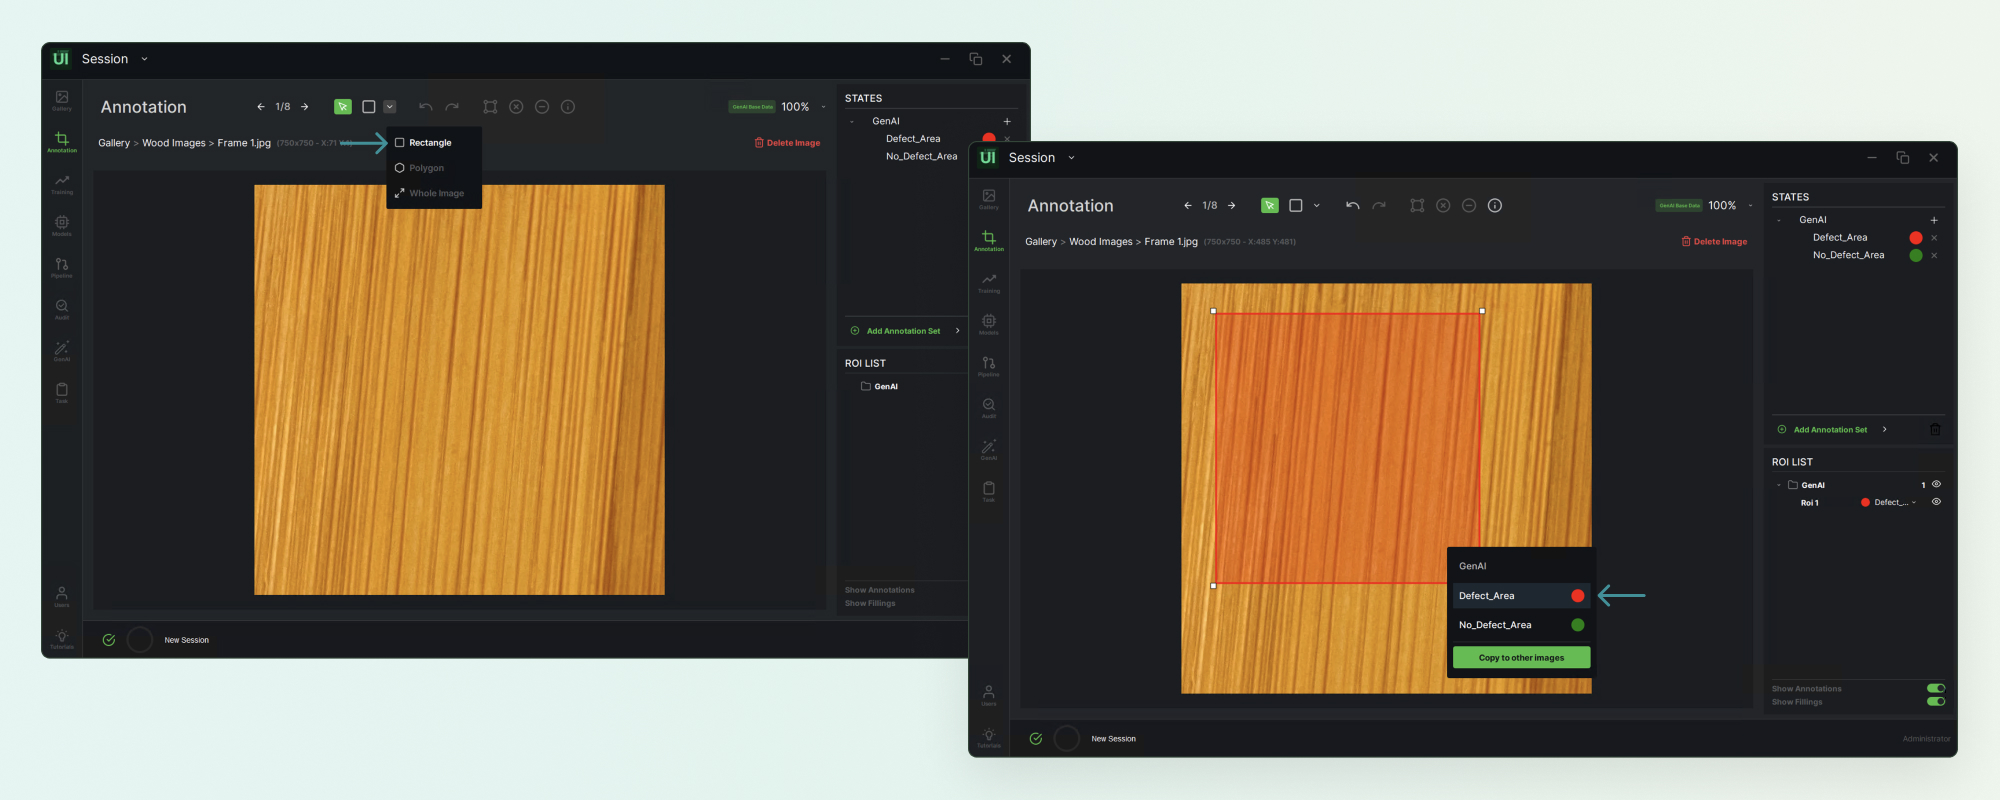
You mark the regions where synthetic defects should be placed. This is what keeps generated defects in plausible positions — on the weld, on the surface, inside the part boundary — rather than scattered anywhere in the frame.
What to do
- Open an image from the imported folder.
- Use the rectangle tool to annotate the areas where you want defects added.
- If it helps, annotate non-defective areas as well — this is supported and tells the generator what clean looks like on the same part.
- Repeat across the images you want to use as the base set.
Select a defect from the library
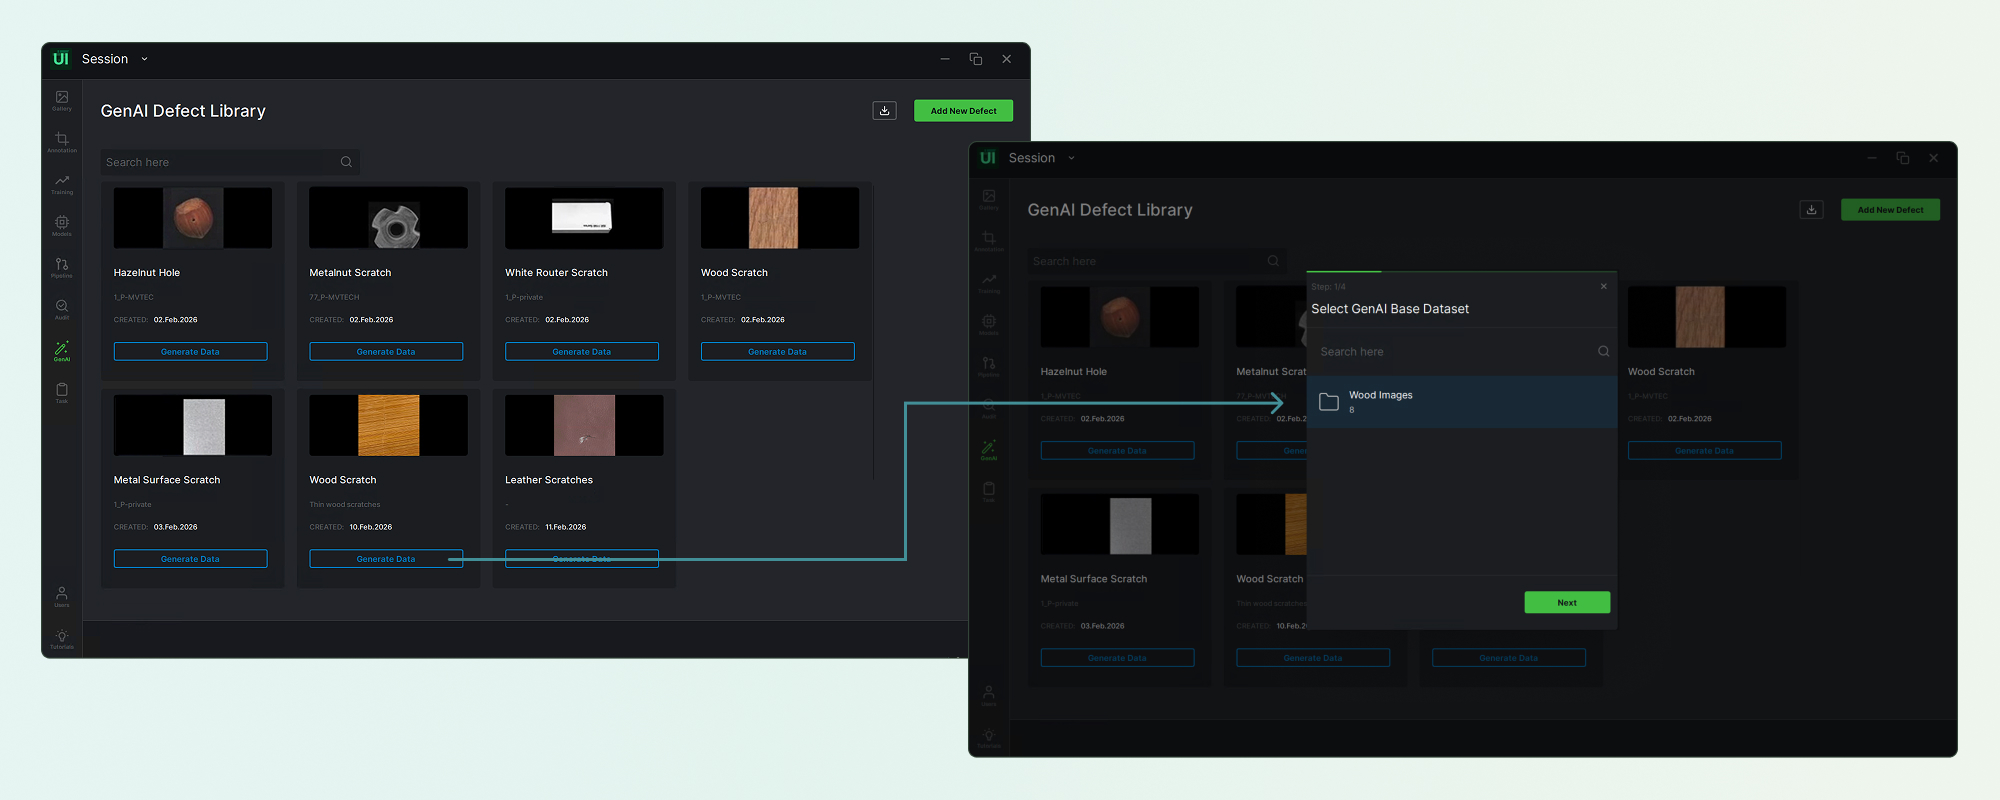
The GenAI Defect Library holds the defect types the platform can render — scratches, cracks, stains, missing material and similar. You pick the defect and the base dataset it should be applied to, and those two choices define the run.
What to do
- Once all annotations are complete, go to the GenAI page.
- Choose a defect from the GenAI Defect Library.
- Select the base dataset to start the process.
Set the generation parameters
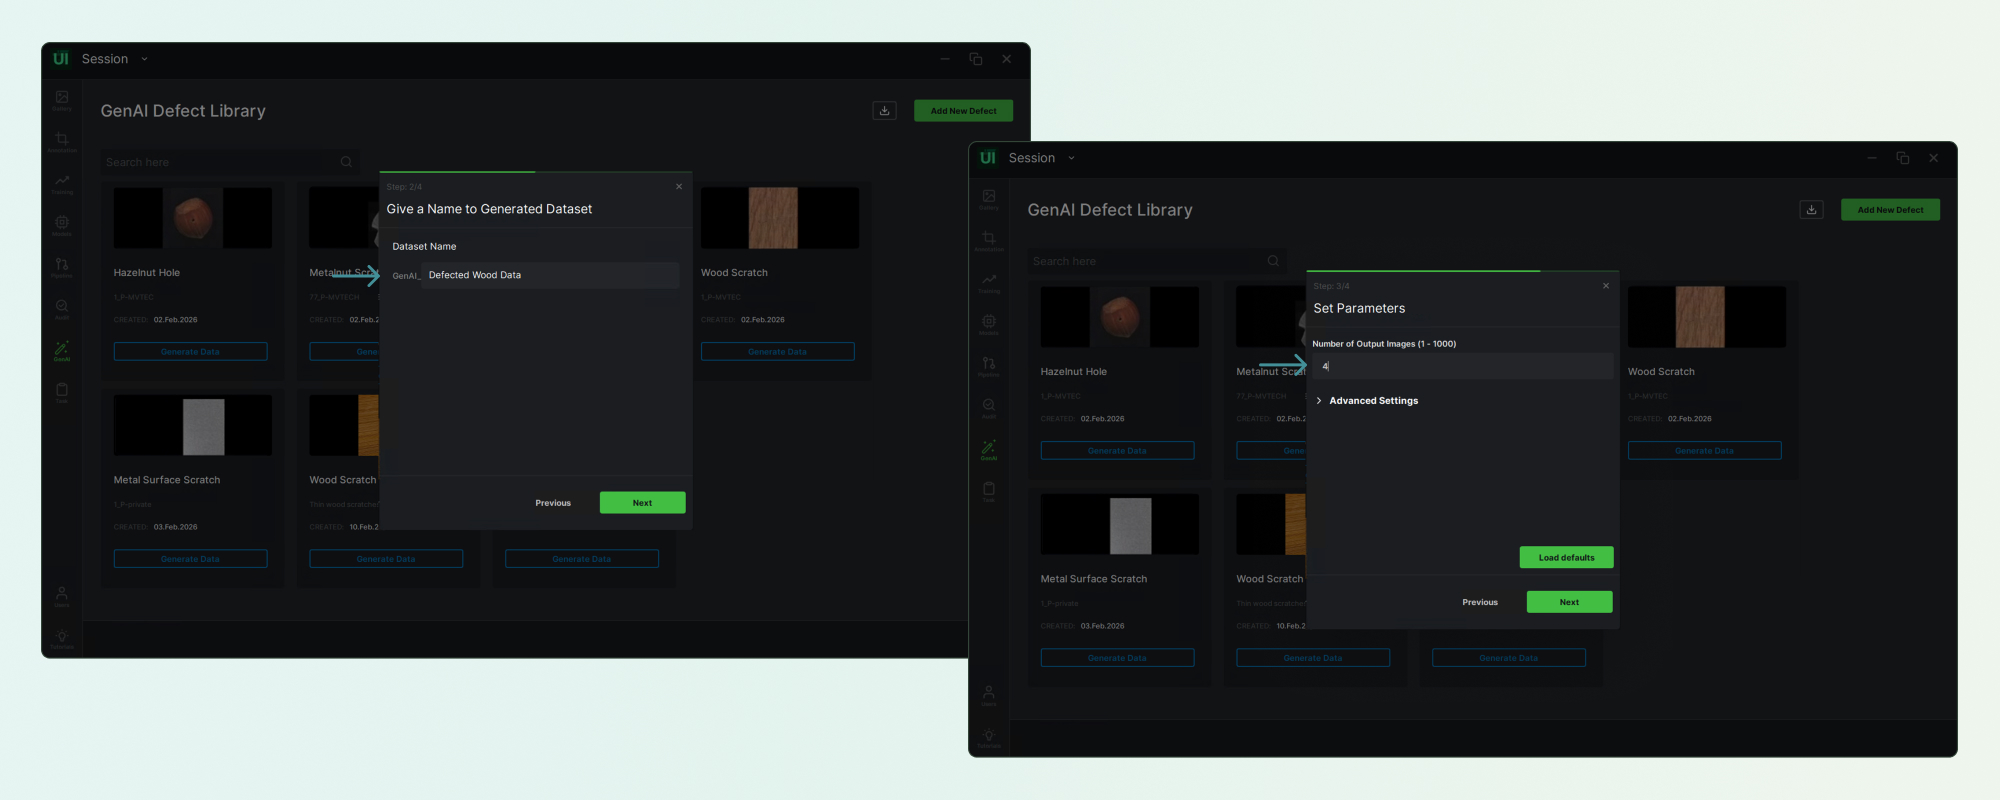
The parameters decide how large the output dataset is and how the defect is scaled onto the base images.
Name the dataset and set its size
- Enter a name for the new generated dataset.
- Set the number of output images.
- Open Advanced Settings if you need to adjust defect scaling — how large the rendered defect appears relative to the part.
Synchronise and generate
- Synchronise the data.
- Click Generate.
- Wait for the confirmation that the dataset has been generated. The new dataset then appears in the Gallery.
.jpg)
Review the synthetic dataset
The generated dataset lands in the Gallery alongside your imported folders. Reviewing it is not optional oversight — these images become training data, so anything unconvincing here becomes a weakness in every model trained on the set.
What to do
- Open the Gallery. The generated dataset is displayed alongside your source folders.
- Double-click the folder to open it.
- Review the synthetic defects in the annotation view.
What to look for
- Does the defect sit where a real one would occur on that part?
- Is it the right size relative to the part, or does the scaling need adjusting?
- Does it blend with the surrounding texture, lighting and grain direction?
- Is there enough variety across the set, or does the same defect repeat almost identically?
Generate synthetic data on your own images
Download ReliVision to work through this guide on your own parts, or explore workflows, training and deployment best practices in the Knowledge Hub.
Download ReliVision


