
Version 3.0.0
The task is to detect defects on metal nuts and classify them. This is a defect detection followed by a 3-class classification task and can be realized as a pipeline.
Raw Data Source: The MVTec Anomaly Detection Dataset*
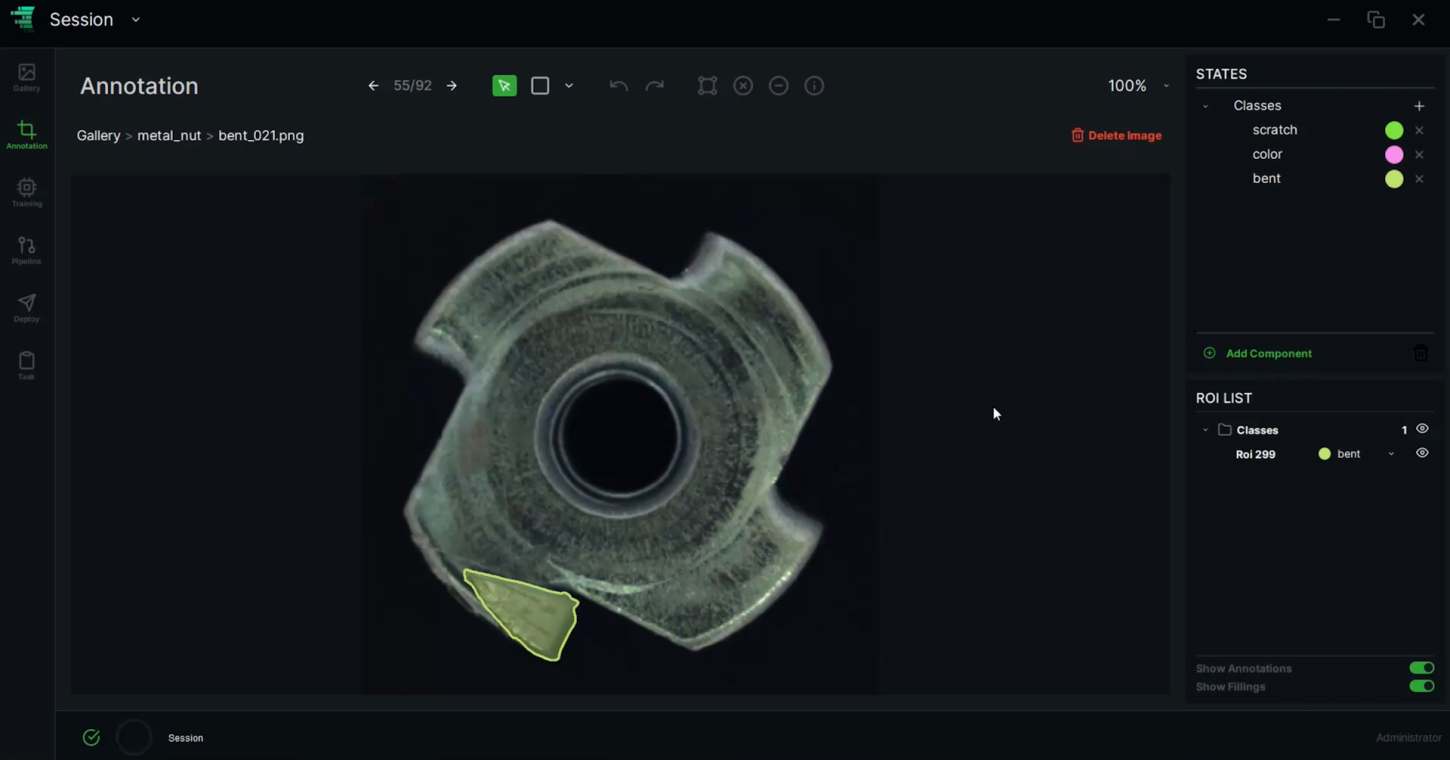
The dataset contains 70 positive (defected) and 22 negative (normal) metal nut samples. There are 3 types of defects, all annotated in LabelMe format, as depicted below.

You have 2 options:
We will be building a pipeline that is composed of a series connected defect detector and a defect classifier. The defect detector will be responsible for detecting the defects, if there are any, and outputting a bounding box. The classifier will be fed with defect detection results (the cropped images of the defects detected) and will decide on the type of the defect (bent, color, scratch).
1. Prepare your data for defect detector training: In order to train a defect detection model, you need to have training images in which all defects, of all types, are annotated with a common label, such as “defect”. The dataset (NOK imageset) provided has polygonal annotations with 3 labels corresponding to different defect types (bent, color, scratch). Merge your NOK labels in your NOK imageset into a single class called “Defect”. Visit ReliVision Knowledge Hub User Guide to see how to do this (Edit ROI States). Then merge the OK imageset with the single class labeled NOK imageset, that you have generated by merging the 3-class NOK labels, into a single dataset. Visit ReliVision Knowledge Hub User Guide to see how to merge two datasets (Merge & Download Datasets).
2. Follow the ReliVision Knowledge Hub User Guide (ReliTrainer: Models) to train your AI model for metal nut defect detection. The main steps, detailed in the User Guide, include
Sample training and validation loss and mAP curves as a function of epochs are as follows:

1. Prepare your data for defect classifier training: In order to train a defect classification model, you need to have training images of individual (cropped) defects labeled with the defect type (bent, color, scratch). The dataset (NOK imageset) provided has polygonal annotations with 3 labels corresponding to different defect types. Extract the polygonal annotations (defects) using the ReliVision data curation functions. Visit ReliVision Knowledge Hub User Guide to see how to extract annotations. Use the dataset thus created with extracted defects for training your classifier.
2. Follow the ReliVision Knowledge Hub User Guide (ReliTrainer: Models) to train your AI model for whole image classification (bent, color, scratch). The main steps, detailed in the User Guide, include
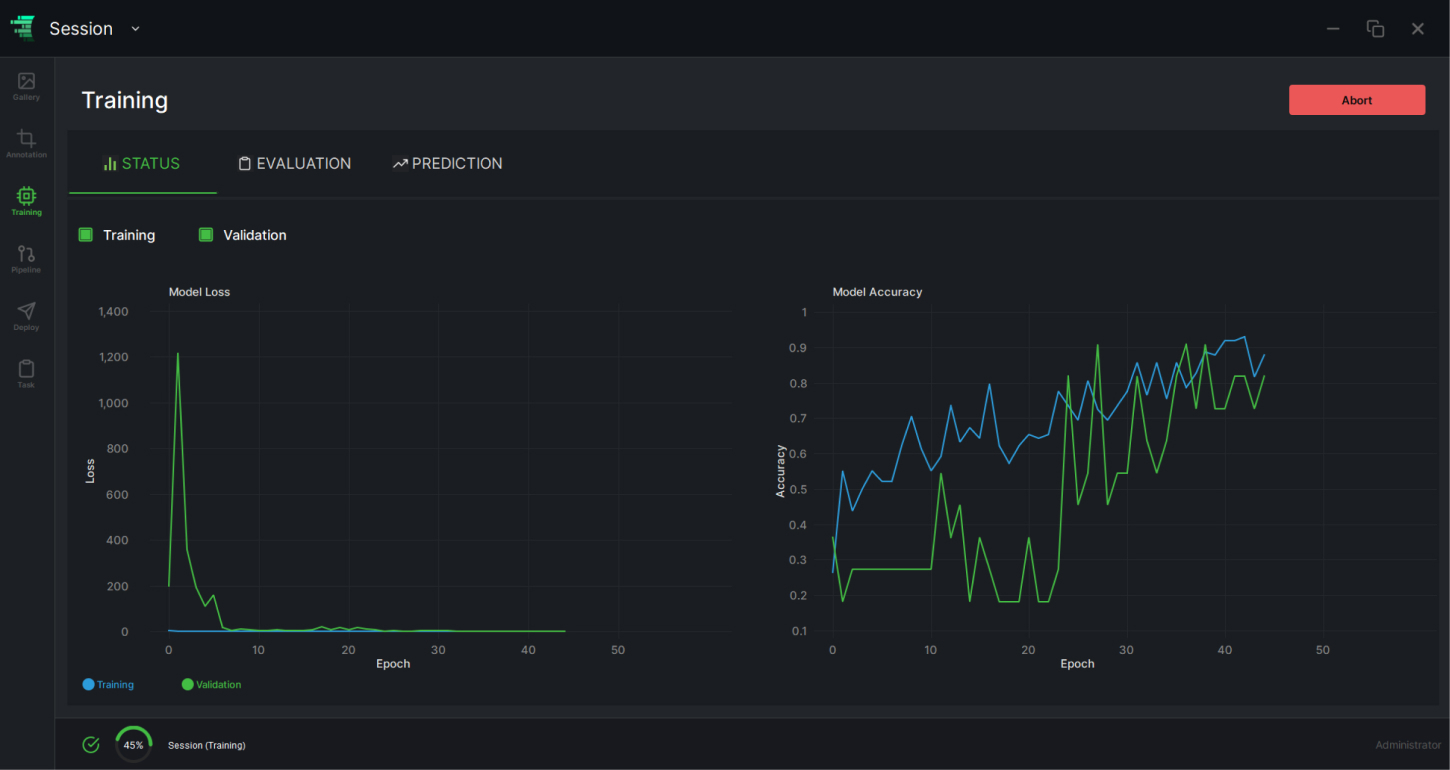
Sample training and validation loss and accuracy curves as a function of epochs are as follows:
Building and Running the Pipeline:
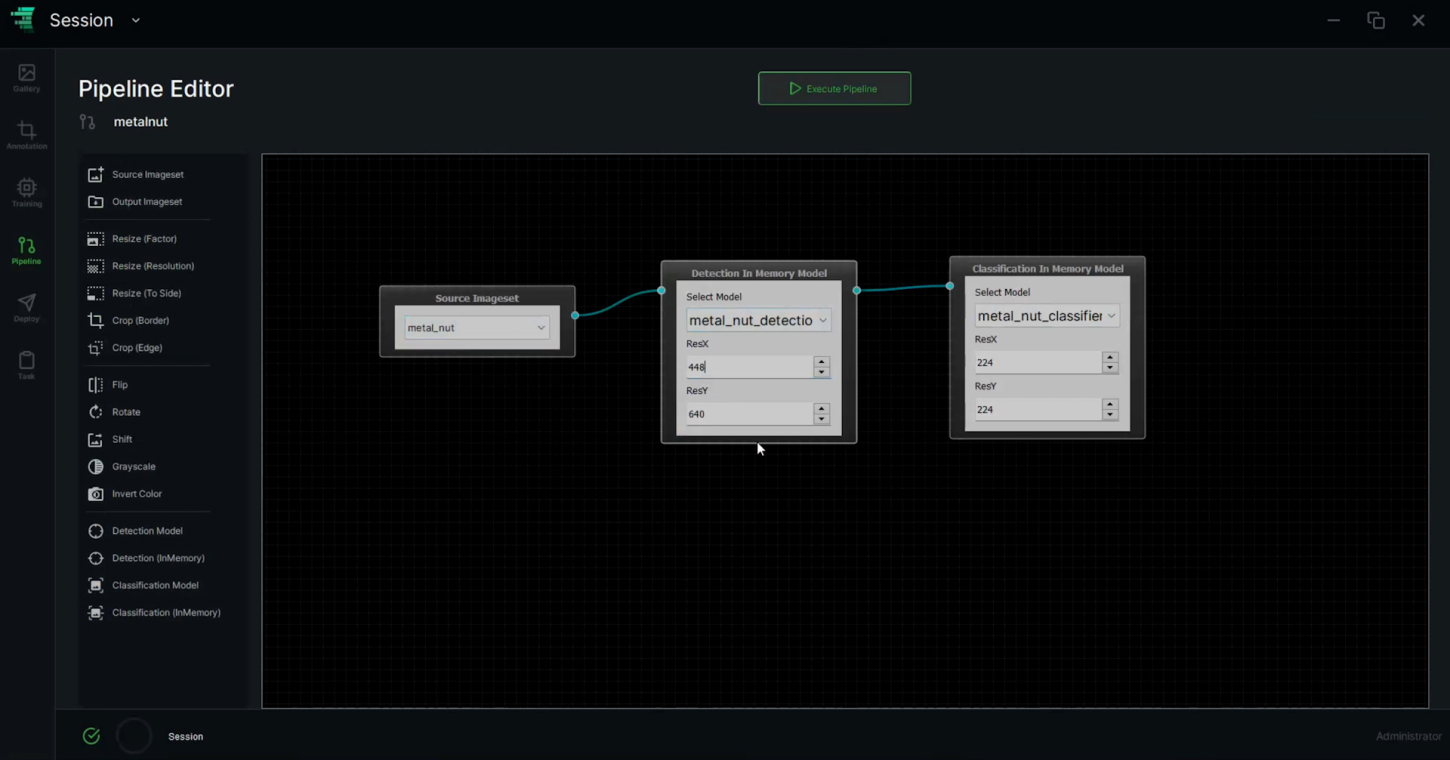
Use the pipeline editor to build your pipeline by dragging and dropping the AI/Basic blocks. For this specific case, we do not need any Basic Block (Digital signal/image processing - DSP/DIP - functions). You will need to select an input data source (your raw image set), a detection AI Block (the defect detector you trained) and a defect classifier (the classifier you trained) connected in series as depicted below. Follow the ReliVision Knowledge Hub User Guide (ReliTrainer: Models / AI Pipeline).
You can review your results using the ReliTrainer data annotation interface. Your pipeline’s outputs will be saved as a separate set of annotations for each image it is run on. Visit the ReliVision Knowledge Hub User Guide (ReliTrainer: Data) for more details on reviewing annotations / inference results.
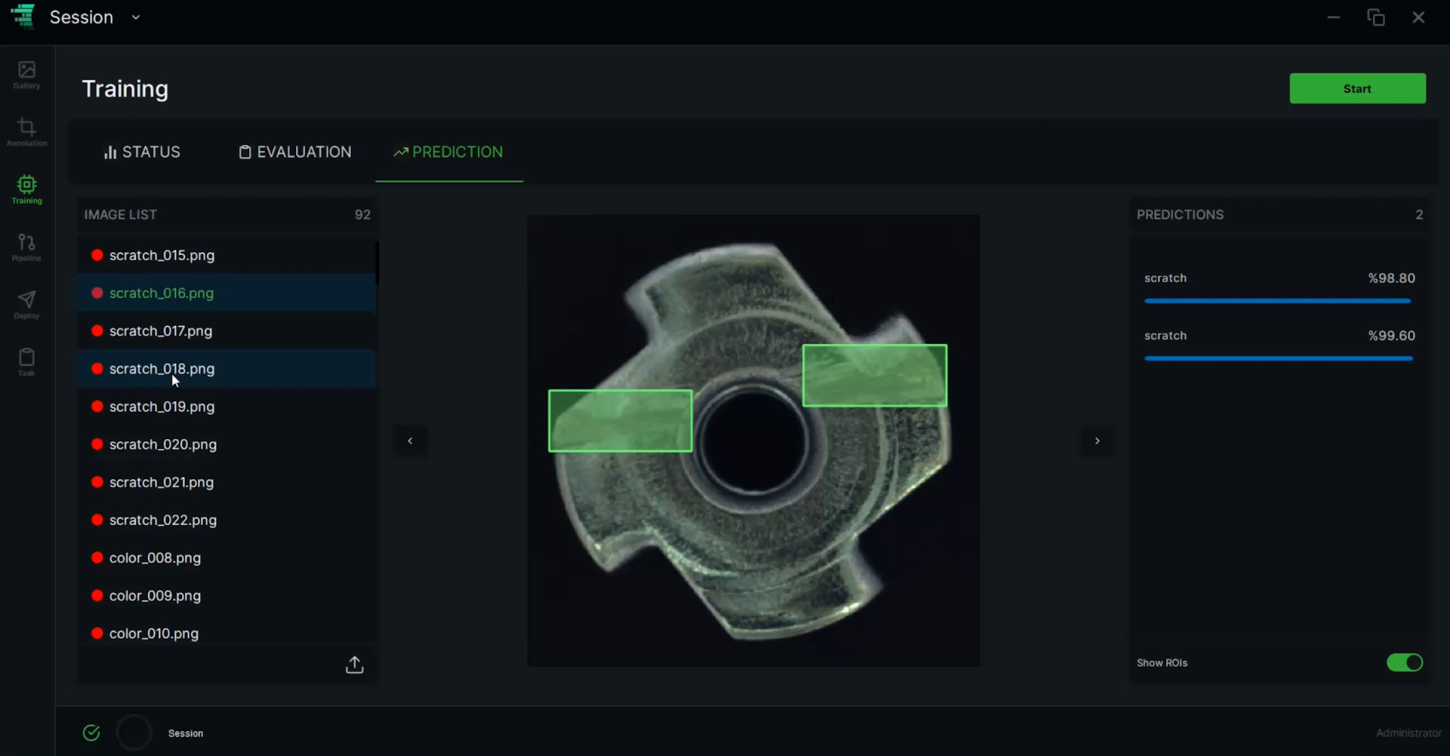
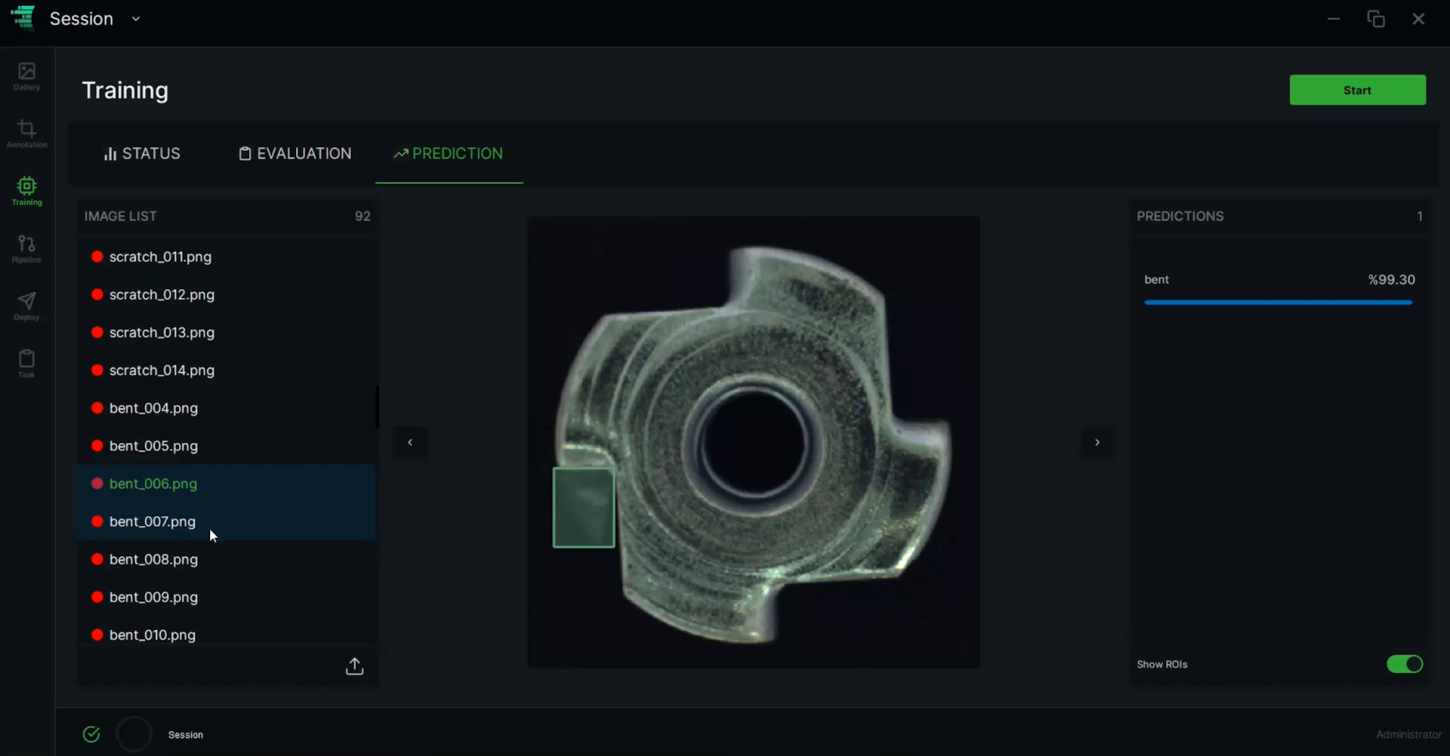
Here are some output examples:
Detected Scratches
Detected bents

Berlin
Volmerstrasse 9
12489 Berlin
Silicon Valley
440 N Wolfe Rd.
Sunnyvale, CA 94085
Follow Us
All rights reserved - 2025 © Relimetrics