

Experience ReliVision in Action—With Your Own Data
Using your own data, we’ll show you how to build, deploy and maintain your own AI-powered inspection solutions with ReliVision without writing a single line of code.
Data annotation process consists of the following steps:
✓ Step 1: Start the Annotation
If you are inside the gallery screen, double-click on the folder dataset to be annotated.
In order to switch the view to the annotation mode, you can select Annotate from the Context Menu (

) or just double click on the Image name or thumbnail. By then, you will be allowed to define different classes and start drawing regions of interest.

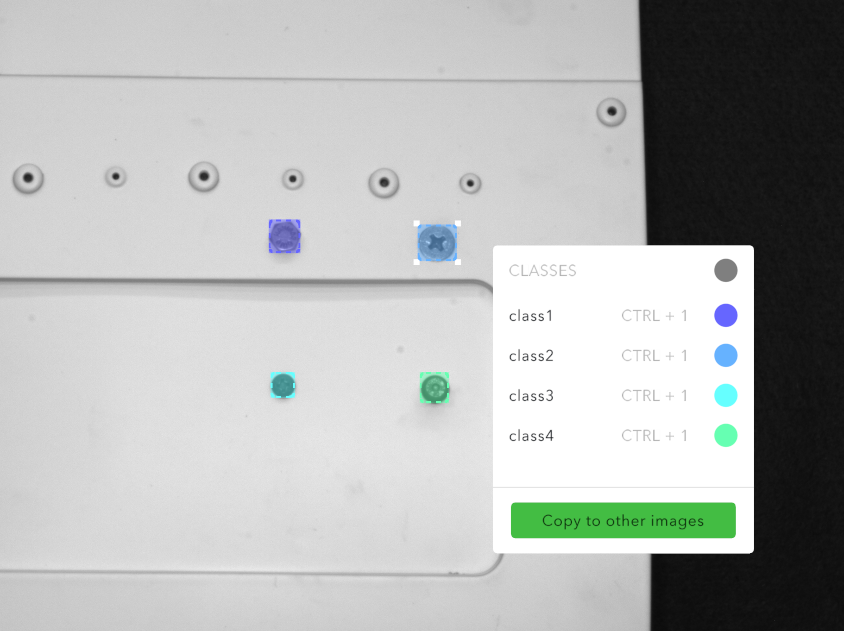
✓ Step 2: Adding and defining components Classes
All possible component classes must be firstly defined. To create different states (such as open, closed etc.), click on the Add Component (+) on the button of the side Menu ( States section) and enter the name of the desired state. The trainer automatically assigns a color to the newly added class. This color can be changed using the color slider inside.

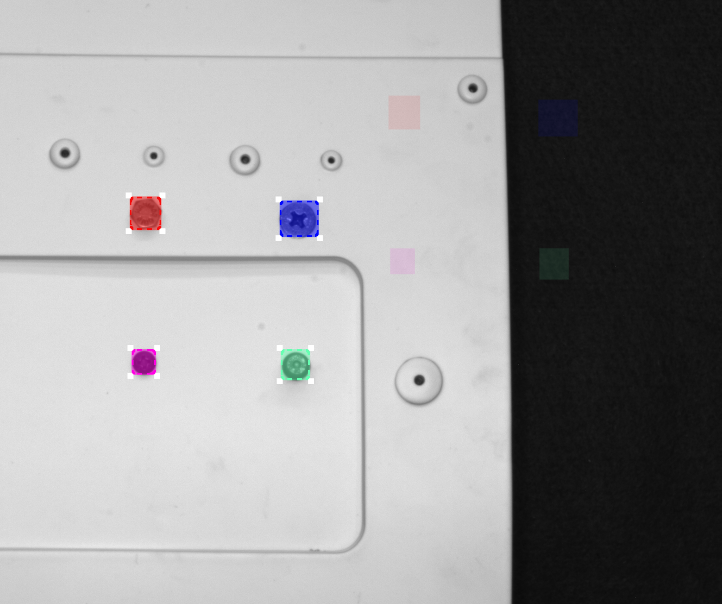
✓ Step 3: Drawing Regions of Interest and assign the corresponding state (ROIs)
The next step is to define the ROIs states. To do this, select the Rectangle Drawing Tool and draw ROIs surrounding the region of interest.
Once an ROI is defined, a context menu, containing all the possible states, appears in the ROI List. You can visually assess the state of the ROI, then select its appropriate matching Class through the context menu (after the right-click).
The user can adjust the ROI position by clicking on it and dragging the rectangle. Similarly, the size of the rectangle can be changed by dragging the corner points.
✓ Step 4: Duplicating the ROIs
To speed up the annotation process, ROIs can be duplicated by selecting and copying them with ctrl+C, and pasted elsewhere with the left mouse click. When one or multiple ROIs are copied, temporary ROIs are shown as in Figure 11. Copied ROIs can be cleared by pressing the ESC button.
✓ Step 5: Copy ROIs on other Images in the Stack
Any ROI can be copied to other images in the set. Users can simply copy one or multiple ROIs and switch to the next image and copy by clicking the left mouse button. Additionally, one or multiple ROIs can be copied directly to the other images of the stack through the Copy to other images button in the context menu of ROIs. This speeds up the annotation process greatly.

✓ Step 6: Applying Previous Steps Recursively
Since the ROIs have been defined in the previous steps, continue assigning correct states to each image.
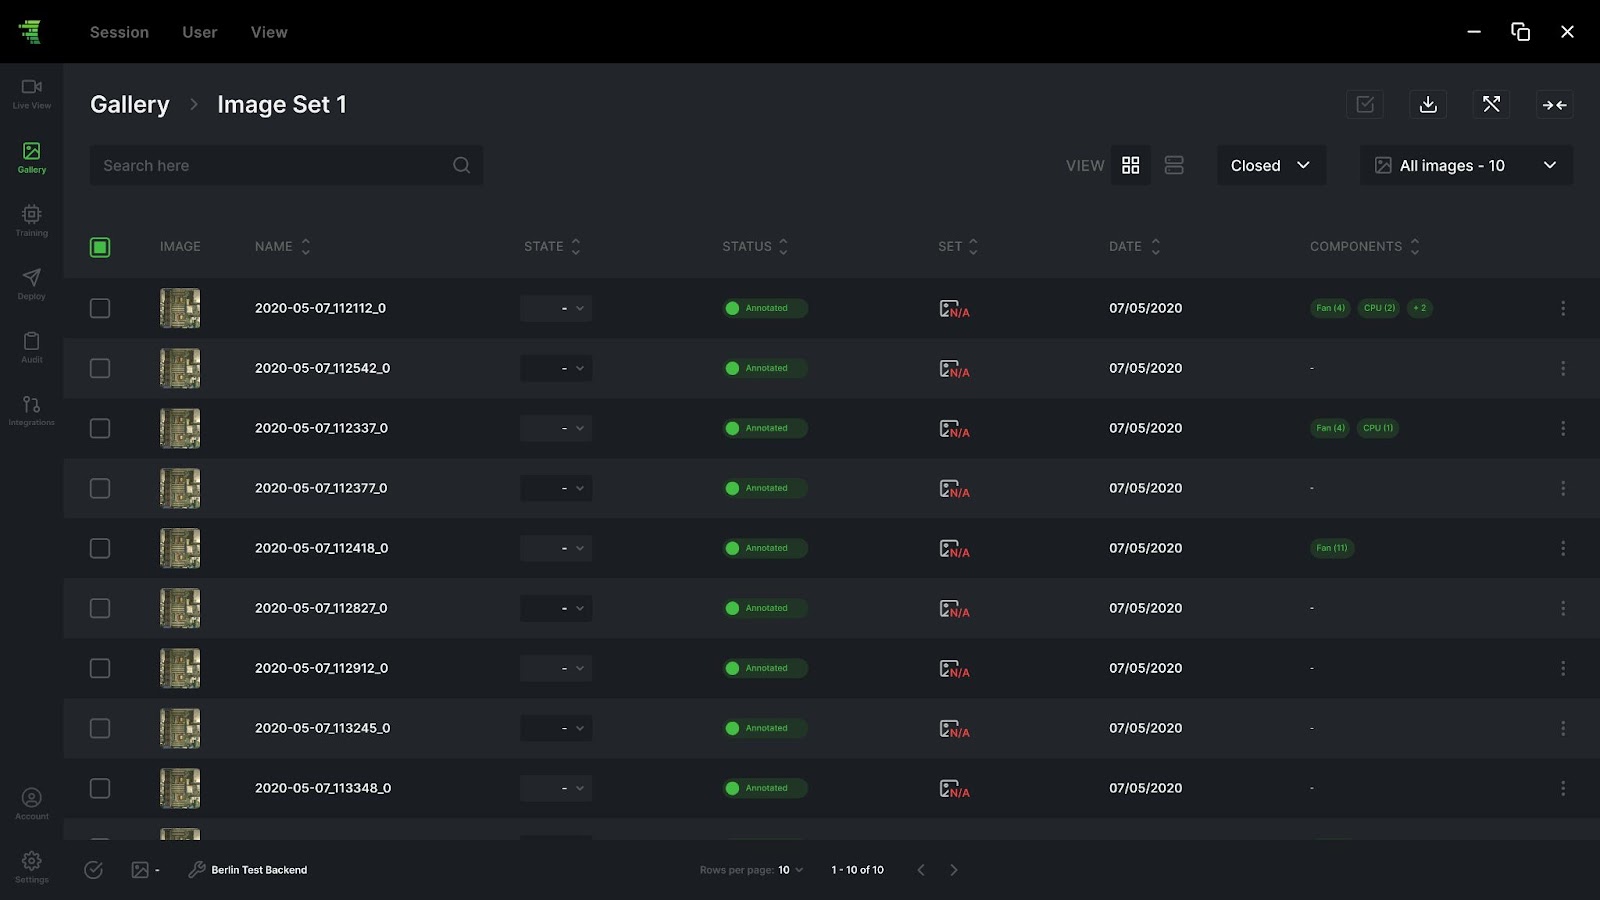
✓ Step 7: Preparation of Training Dataset
Upon completion of Steps 1 to 8, go back to the Gallery Screen from the side menu. Before the training can take place, the image set for the training process needs to be created which will be mentioned in the next set of instructions. As previously shown, the Image Gallery screen shows image set folders. Inside the image set folder, the annotation status of the images of the stack can be seen along with their annotated component names.
The final step in preparing the image set for training is splitting the images into training and validation datasets. The training dataset is used to train the model, and the validation dataset is used to validate the model. To do the splitting, click on the Split Button (

). The system does the splitting automatically to create a balanced dataset for the training.

Or the splitting can be done manually by selecting multiple images and assign them to a set with the Apply to Multiple Image (

)button. Images selected for training and validation can be viewed by using the Filtering Combo Boxes on the top left.
